Riding a bike in the winter can be challenging, but with a few modifications, you can turn your regular bike into a winter-ready machine.
There are several easy and affordable ways to make your bike more suitable for winter riding, from changing your tires to installing mudguards and more.
In this article, we’ll explore the step-by-step process of converting your regular bike into a winter bike, so you can continue enjoying the benefits of cycling all year round.
Is there such a thing as a winter bike?
When we talk about “winter bikes”, we don’t actually mean a specific type or category of bikes (like mountain bikes, road bikes, etc.). Instead, the term “winter bike” describes a bike that is adapted to handle the challenges of winter riding conditions.
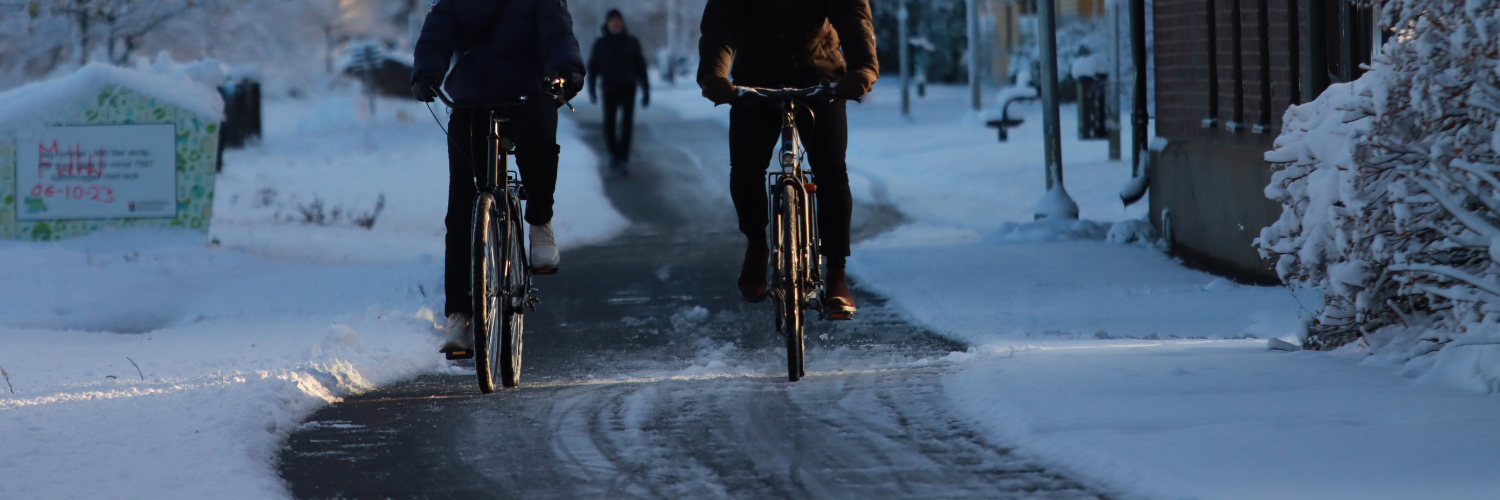
Cycling in winter comes with its own set of challenges, like the snow, icy roads, and the cold temperatures. And not every bike can handle these conditions.
However, almost any bike can be converted to a winter bike, and it doesn’t matter if it’s a mountain bike, gravel bike, or even a road bike. You can make a few adjustments to your regular bike to make it ready for winter cycling.
And keep in mind that the exact modifications your bike needs will depend on how serious the winter in your area is.

Converting a regular bike into a winter-ready bike
There are a few things you can do to get almost any great bike ready for winter. The first thing to consider will obviously be the bike frame. The frame of a bike has to be made with materials that can resist corrosion, especially during the wet and cold winter months.
Materials like aluminum and stainless steel are usually the best for winter because they can withstand exposure to salt and moisture, which are common on winter roads.
If you have a bike with the right frame material, then the next consideration will be the bike components like the tires, mudguards/fenders, brake, gear, etc.
Here’s how to convert your regular bike to a good winter bike:
Step 1: Get Special winter tires
Since winter roads tend to be slippery, a good winter bike should have wider tires with tread patterns that provide a sturdy grip on the road for maximum traction on ice and snow. Thankfully, there are special winter tires that are made for riding on icy winter roads.
And getting your bike ready for winter can mean swapping out your regular tires for a good set of winter tires.
As a cyclist, it’s actually very important to have a set of dedicated winter tires and switch them out during the colder months.
The best winter tires have knobby or studded tread patterns, and here are some important factors to consider when choosing dedicated winter tires for your bike:
Studded Tires
- Studded tires are made with metal studs embedded in the tread to improve traction on icy roads. They are particularly effective for winter commuting in areas where ice is a serious concern.
Wide Tires
- A tire width of 35mm or more is generally best for winter commuting because wider tires provide better stability and traction on snow and slush. Plus, the increased surface area helps distribute weight and prevents the tire from sinking into softer surfaces.
Tread Pattern
- It’s common knowledge that tires with a slightly aggressive or knobby tread provide better traction. Therefore, tires with a tread pattern also provide good grip on snow-covered roads.
Quality & Durability
- Winter conditions can be quite harsh on tires, so it’s important to go for tires that are made from durable materials that resist damage from salt, moisture, and other winter-related elements. To be on the safe side, look for tires designed specifically for cold weather.
Other important factors to consider is the puncture-resistance feature, as this can help prevent unnecessary flats on the road.
Tubeless tires have also become popular for winter commuting because they can be run at lower pressures without the risk of pinch flats. And this can improve traction and comfort on snowy or uneven surfaces.
Best Bike Tire for Winter Commuting
Popular brands that offer winter-specific tires include Schwalbe, Continental, and Nokian. Here are the best bike tires on Amazon for winter commuting.
Schwalbe winter 700Cx30C

This is my go-to choice for a safe and confident winter commute, especially in icy conditions. These tires are designed for riding on frosty streets, and they provide excellent traction both on ice and hard-packed snow.
They do add a lot of rolling resistance, which means better traction and control on icy surfaces, so you’ll have safer and more stable rides.
Ice Spiker Pro Studded Tire
This is another great option from Schwalbe. Schwalbe is a popular brand for winter-specific bike tires, and they never fail to deliver great quality.

The Ice Spiker Pro Studded Tire offers incredible grip on icy surfaces for amazing traction, and they’re great for gentle turns on ice and hard-packed snow.
It’s certainly a must-have, if you enjoy winter biking adventures.
Continental Top Contact Winter

The Continental Top Contact Winter tire is also a reliable choice for a secure and comfortable winter commute. They’ll give you excellent grip on wet or snow-covered roads, with no slipping or sliding.
Their extra width and grippy nature gives a secure contact on wet roads. However, if you frequently ride on icy patches, one of the studded tires above might be a better fit for optimal traction.
Step 2: Install Fenders/Mudguards
Fenders and mudguards may not be necessary when riding in dry conditions, but they are absolutely a must for winter riding. These accessories will keep slush, snow, and water from splashing on you.
And if you’re still wondering if you actually need mudguards? Well, you do. Because without them, you could end up with a wet and muddy back. Mudguards and fenders will help you stay cleaner and protect your bike from the mess that winter roads can bring.
Fitting mudguards and fenders on a bike is usually pretty straightforward. Most bikes have places to attach them near the wheels, and you can often adjust them to fit your bike properly.
You might need a few basic tools, like a wrench or screwdriver, but many mudguard sets come with clear instructions, making it relatively easy for most people to install them without much trouble.
Best Mudguards & Fenders for Winter Commute
Here are the best bike mudguards and fenders on Amazon for winter commuting.
TAVGO Bike Fender Set

These fenders are compatible with most bike types. They’re perfect for MTBs, road bikes, city bikes, and more.
They’re made from super anti-pressure PVC, which means that these fenders are very durable, rust-free, and easily washable.
FETESNICE Front and Rear Bike Fender

This is another great set of mudguards for winter commuting — they’re thicker and more durable than typical fenders.
Despite the extra thickness, they’re very sturdy and do not crack easily. You can very easily install these mudguards on your mountain bike and enjoy reliable protection against mud.
BlueSunshine Adjustable Bike Front/Rear Mudguards

If you want more versatile fenders that can go on various bikes, including mountain, road, touring, and racing bikes, this is a great choice.
These fenders are durable, great for everyday use, and effectively protects against mud and water splatter. They’re lightweight, very easy to install, and an essential addition to your winter cycling gear.
Step 3: Check Your Brakes
Preparing your bike for winter also means checking your brakes to make sure they are in great working conditions. And if you have rim brakes, you may need to upgrade to disc brakes or find yourself a good bike with great disc brakes.
Rim brakes can be great, but they’re certainly not for winter. Disc brakes are the most suitable brakes for riding in winter because they offer much better stopping power on wet and icy roads.
If you already have disc brakes, then you need to clean it and do some maintenance to get it in top working condition. Clean the brake surfaces and make sure the brake pads have enough grip.
Also, check for any signs of wear and tear, and if needed, replace the brake pads. Doing these simple checks helps make sure your brakes are in good shape for safe riding in winter.
Step 4: Lube Your Bike Chain
Winter can be very tough on a bike’s chain and drivetrain because water can wash away lubricant, leaving the chain dry and vulnerable to wear and grit.
With this in mind, you can take extra care of your bike’s drivetrain during winter by using a durable lubricant suitable for typical winter conditions.
Thankfully, there are some really great chain waxes that, once applied, forms a protective layer that lasts longer than traditional oils and doesn’t attract debris.
But if you decide to opt for an oil-based lubricant, choose one designed for wet conditions to resist washing off during rides.
In addition to greasing your bike chains, it’s also important to regularly degrease them to prevent grit buildup and extend your drivetrain’s lifespan. And this is especially important in winter.
Here are some great bike chain and degreaser recommendations for you:
Muc Off Wet Bike Chain Lube

This is a wax-based formula that coats the chain, helps to repel water, and ensures long-lasting lubrication in wet and muddy conditions.
It’s an ultra-durable bike chain lube that penetrates deep to provide long-lasting chain protection, which makes it an ideal choice for winter commuting. A single application can last up to 150 miles.
WD-40 Specialist Bike Wet Chain Lube

If you want a no-wax formula that provides great protection, this is a great option for you.
WD-40 Bike Wet Chain Lube is specially made for wet, muddy, and extreme conditions, and forms a lasting shield that prevents water and mud damage.
It’s ideal for winter commuting, and will protect your chains, gears and derailleur.
Park Tool Bike Cleaning System

The Park Tool Bike Cleaning System is a convenient all-in-one solution for bike maintenance.
The included liquid degreaser works excellently and eliminates the usual mess associated with cleaning.
Step 5: Get Good Lights and Reflectors
Cycling during winter often means riding in low-light conditions, which means that lights and reflectors are essential bike accessories in winter.
Bike lights are important for two main reasons, the first and most obvious reason is to improve your visibility as a rider, but another equally important reason is to make yourself visible to road users including drivers, pedestrians, fellow cyclists, etc.
A bright light with a focused beam in front of your bike will help you see the road clearly, especially in darker winter conditions. And a rear bike light with colored beam (especially red color) will help to make you clearly visible to other road users.
In the limited daylight hours of winter, bike lights play a critical role in preventing accidents and ensuring a well-lit, secure commute for both the cyclist and those sharing the road.
With this in mind, you’ll need to add very bright front and rear bike lights to your list of essential accessories for getting your bike ready for winter cycling.
So, how do you choose the best bike lights for winter? There are a few factors to consider, and we’ll go over them in a bit.
Here are key considerations for choosing the ideal bike light:
Lumen Output
Lumen is the unit for measuring the intensity of light emitted from a light source, so the higher the lumen, the brighter the light.
A good front bike light with 200 to 400 lumens is great for urban commuting in winter. If you’re more into trail riding, a brighter light with up to 600 lumens will be more ideal.
And if you enjoy mountain biking, a higher intensity lighter of up to 1000 lumens or more is what you should be looking for.
Beam Pattern
Most bike lights will have a focused beam to clearly light up the path ahead, but some may have a spotlight-like focus to provide a broader, flood-like beam.
While the focused beam pattern illuminates the road or trail effectively, the wider beam pattern provides better visibility from different angles. The better choice for you here will largely depend on your environment and the type of riding you do.
A focused beam pattern helps illuminate the road ahead. Some lights have a spotlight-like focus, while others provide a broader, flood-like beam. Consider your typical riding environment to choose the most suitable beam pattern.
Rechargeable vs. Replaceable Batteries
When shopping for bike lights, you will have to decide whether you want one with rechargeable batteries or replaceable batteries. I’m pretty sure you can already tell the difference between the two.
Some cyclists prefer lights with replaceable batteries, so they can carry spares for longer rides and not worry about running out of battery juice.
Rechargeable lights are convenient and cost-effective in the long run, but you always have to be sure you charge your lights so they have sufficient battery life for your commute.
If you prefer bike lights with rechargeable batteries, then an extra feature to consider is the battery life.
Obviously, the longer the battery life, the better. And longer battery life is essential for winter commuting, especially because colder temperatures can reduce battery performance.
Waterproof Rating
Lastly, you need to choose bike lights with a high waterproof rating to withstand rain, snow, and wet conditions. Look for lights with an IPX4 rating or higher to ensure reliable performance in winter weather.
Best Bike Lights for Winter Commute
Here are the best bike lights on Amazon for winter commuting.
Cuvccn Rechargeable Bike Lights

The 500 lumens beam of light is extremely bright and very easily lights up gloomy winter roads. These lights are very convenient, and you can very easily attach and detach them from your bike.
Battery life is good even with their impressive brightness. The large-capacity rechargeable batteries can last for up to 58 hours in “Slow Flash” mode, and at an IPX6 waterproof level, they’re perfect for rainy or foggy days.
Ascher Ultra Bright USB Rechargeable Bike Light Set

With a maximum output of 300 lumens, the lights are extremely bright, lightweight, and great for safe and worry-free nighttime rides.
This set features a powerful front light with a 2000mAh rechargeable battery and a taillight with a 330mAh rechargeable battery.
They are compact and easy to install on handlebars and the rear of your bike. And the IPX4 waterproof rating means you can use it in wet conditions.
Yosky USB Rechargeable Bike Light Set

At 1000 lumens and a wide 160° angle, these bike lights are powerful and provide very high visibility in the dark.
It’s also fitted with a 4000mAh rechargeable battery, which charges quickly via USB for added convenience.
They are well-made, easy to install, and a reliable choice for your winter commutes. The water-resistant rating is up to IPX5.
Step 6: Protect Your Bike Frame
Riding a bike in winter means exposing the bike frame to harsh elements like melted ice and the salts used to treat winter roads.
Bike frames are made of metals which can corrode when exposed to certain conditions. You may be thinking, “but bike frames are treated to resist corrosion.” Yes, they are, but if you intend to expose your bike to tough weather, it won’t hurt to add an extra layer of protection.
In fact, this isn’t supposed to be optional, I consider it an essential part of prepping a bike for winter, because if you’ll be putting your bike through the troubles of riding through snow and ice, then it deserves some TLC.
Frame protection is often clear protective film or coatings that will act as a barrier to prevent salt and moisture from directly touching the frame.
Applying a protective coating to vulnerable areas of the frame will guard against corrosion caused by salt and moisture.
Best Bike Frame Protection for Winter Commute
Here are the best bike frame protection on Amazon for winter commuting.
WilderWild Bike Frame Protection Tape

The 15mm thick vinyl material provides long-lasting protection of a bike’s frame and paint.
You can easily install this on flat sections of your bike frame, but wrapping curved edges can be tricky.
However, it’s still an excellent choice for winter bike frame protection at an excellent price point.
VViViD 3M Clear Paint Protection

If you’d rather have your bike in its original appearance, then this is what you want. When applied, it forms a transparent protective film of your bike frame; the clear and almost invisible finish seamlessly blends with the frame chassis.
This means that it preserves the original appearance of your bike while also protecting it from scratches, chips, and weather damage throughout winter.
3M Scotchgard Clear Paint Protection

The Scotchgard gives your bike frame the protection it deserves for winter commuting. This durable and almost invisible tape adds a protective layer to your bike, ensuring it endures the winter elements with ease. It can also keep your bike looking new through multiple seasons.
Other considerations to make your bike winter-ready
Frame Clearance:
- Make sure there’s enough clearance around the frame and fork to accommodate wider tires and prevent snow buildup.
Rust-Resistant Components:
- You need to consider upgrading critical components, such as the chain, to rust-resistant materials like stainless steel.
Sealed Bearings:
- Also, consider replacing standard bearings with sealed bearings in areas prone to moisture exposure, such as the bottom bracket and hubs.
Temperature-Resistant Components:
- Use cables, brake pads, and other components designed to withstand colder temperatures.
Regular Maintenance:
- Keep up with regular bike maintenance, cleaning the bike more frequently in winter to remove salt and debris.